Blog Post by Vicki - A Cake on Life
Visit her website here
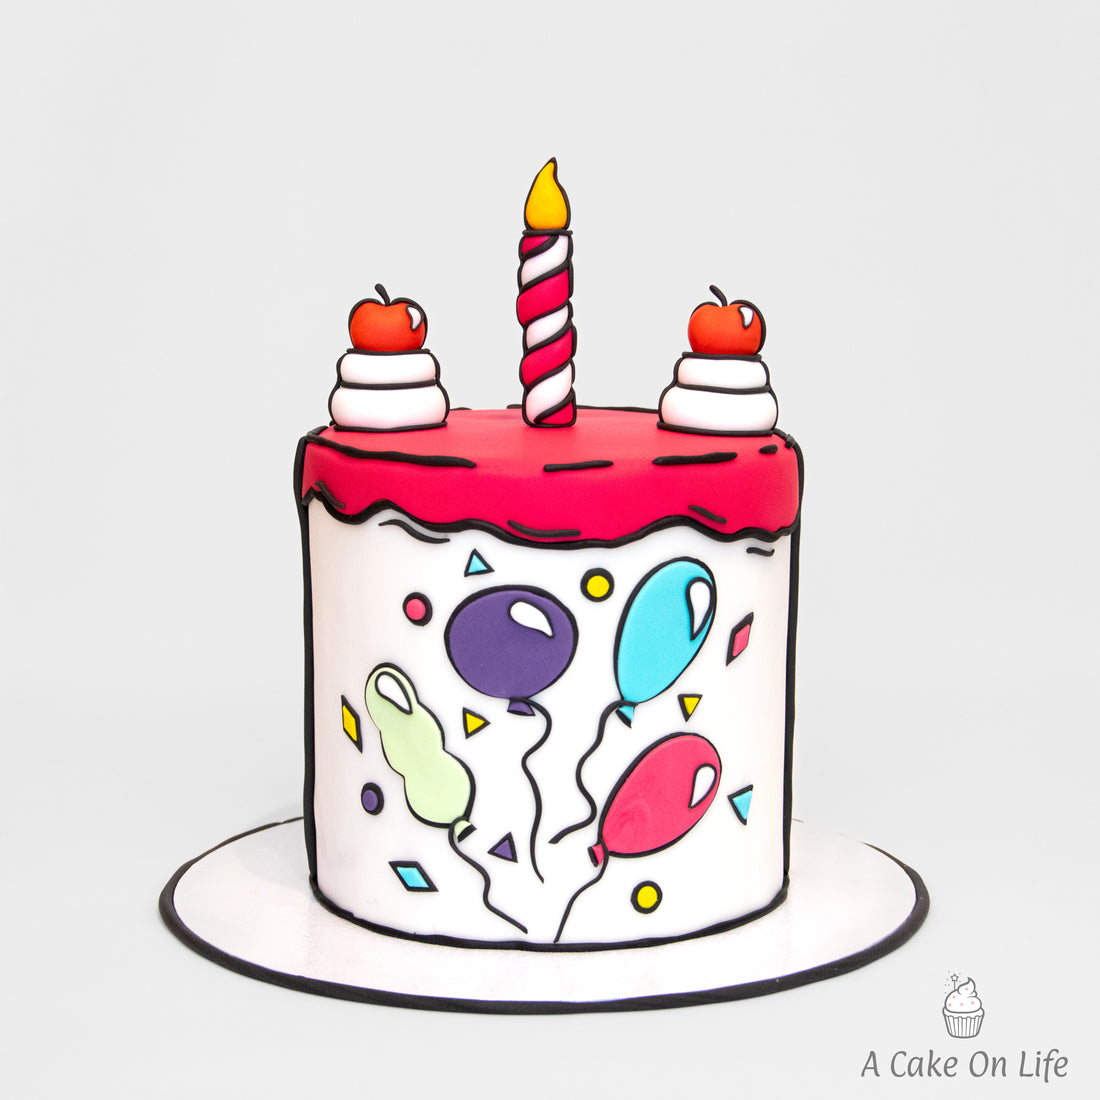
I’m super excited to share with you how to make a cartoon cake! I made the cake above for my daughter’s 8th birthday! How can she be 8 already? It really is unbelievable how quickly the time goes by. I made her my first cartoon cake and it was so much fun! These are sometimes called comic cakes and the comic/cartoon cake trend is huge right now! I just loved making it.
The cake was a three layer 6 inch madeira cake. It was about 7 inches tall, which I needed for my design. If it wasn’t tall enough, I wouldn’t have had enough space for the balloons and confetti.
As there’s quite a lot to go through in decorating this cartoon cake, I decided to split the tutorial into two parts. Part 1 shares how to add the pink icing, black outlines, balloons and confetti shapes. Part 2 shares how to make the candle, cherries and cream. As usual, I used a clear alcohol for my glue, but you could always use an edible glue if you preferred.
PART 1: HOW TO MAKE A CARTOON CAKE VIDEO
The pink icing that I used on top of the cake was Renshaw fuchsia ready to roll icing. I created the black outlines using black The Modelling Paste and the balloon/confetti decorations were made with Renshaw white modelling paste. I coloured it myself with food colouring gels. The balloons were made using FMM’s Party Balloon Cutter Set and the confetti shapes were cut from FMM’s Essential Shapes Cutter Set. In the video below, I take you through how to use these cutters to create the design on the cake.
PART 2: HOW TO MAKE A CARTOON CAKE VIDEO
Part 2 covers how to make the candle, cherries and cream that decorate the top of the cartoon cake. The candle was made from modelling paste. I made my own modelling paste by adding a tiny amount of CMC Powder to my sugarpaste. I always have CMC powder in my cupboard, as it’s really handy to make small amounts of modelling paste when you need them. It’s much more economical too. In this case, it also allowed me to use the same pink for the candle, that I used for the pink icing on top of the cake. I do insert a toothpick through the candle. I did this mainly so I had something to insert it into the cake with. If you do use a toothpick, make sure that you tell the person who you are making the cake for and to remove it before cutting and eating.
As the cream and cherries don’t need any help with holding their shape, I just made them with normal sugarpaste.
So that’s how I made my very first cartoon cake. Happy to say that my daughter loved it! I really hope that you found this tutorial useful. I would love to see any photos if you make your own cartoon cake. Please tag me on any of my socials, links below!
Vicki x